The Hidden Costs of DIY Tile Installation (And How to Budget for the Mistakes)
Whenever a homeowner looks at a bathroom renovation estimate, the tile labor cost always triggers a wave of sticker shock. The thought process is almost universal: 'I can buy the tile myself for two dollars a square foot, watch a few YouTube videos, and save three thousand dollars.' In reality, tile installation is a deeply unforgiving trade. If you make a mistake painting a wall, you just paint over it. If you make a mistake installing ceramic floor tile, the entire floor cracks under the weight of your footsteps a month later. You have to tear it all out with a sledgehammer and start over. That is the hidden cost of DIY.
My Hands-On Experience with Failed DIY Jobs
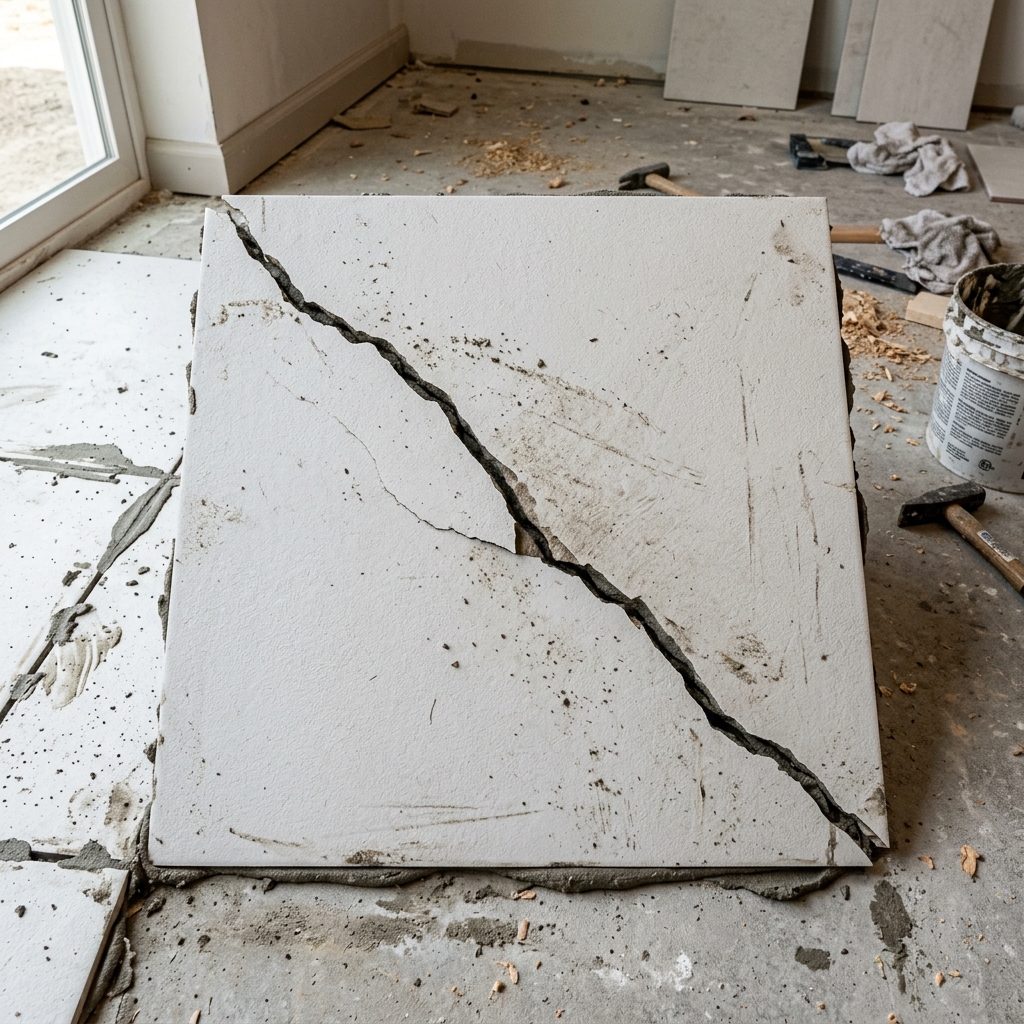
In late 2025, a client called me in a panic to fix a master bathroom floor they had tried to tile themselves. They bought beautiful large-format porcelain tiles. Because they skipped the subfloor leveling process and used the wrong size trowel for the thinset, the tiles had massive voids underneath them. When the client walked into the bathroom on a cold morning, three of the large tiles snapped directly down the middle. We had to remove the entire floor, buy new tiles, pour self-leveling underlayment, and completely reinstall it. Their attempt to save $1,500 on labor ended up costing them an extra $2,800 in replacement materials and demolition fees.
The Subfloor Prep Trap
Most DIY budgets account for the tile, the grout, and maybe a bag of thinset. They rarely account for the intense structural prep required beneath the surface. You cannot glue rigid tile to a bouncy wooden subfloor. According to the Tile Council of North America (TCNA), the subfloor deflection (how much the floor bends when you step on it) must meet strict architectural standards. If your floor bounces, the grout will crumble out of the joints within a week.
To fix a bouncy floor, you usually have to buy and install heavy cement backer board, or lay down an uncoupling membrane like Schluter Ditra. A roll of uncoupling membrane can easily cost $150. You also need special unmodified thinset just to glue that membrane to the plywood. Suddenly, you have spent $300 before you even open the first box of actual tile.
If the subfloor is concrete but uneven, you have to buy bags of self-leveling compound. These cost around $40 a bag, and a medium-sized bathroom might require six bags to flatten a sloped floor. If you skip this step, the corners of your tiles will stick up—a flaw known in the trade as 'lippage.' Bare feet catch on those sharp edges every time you walk into the room.
Thinset Math and Trowel Sizes
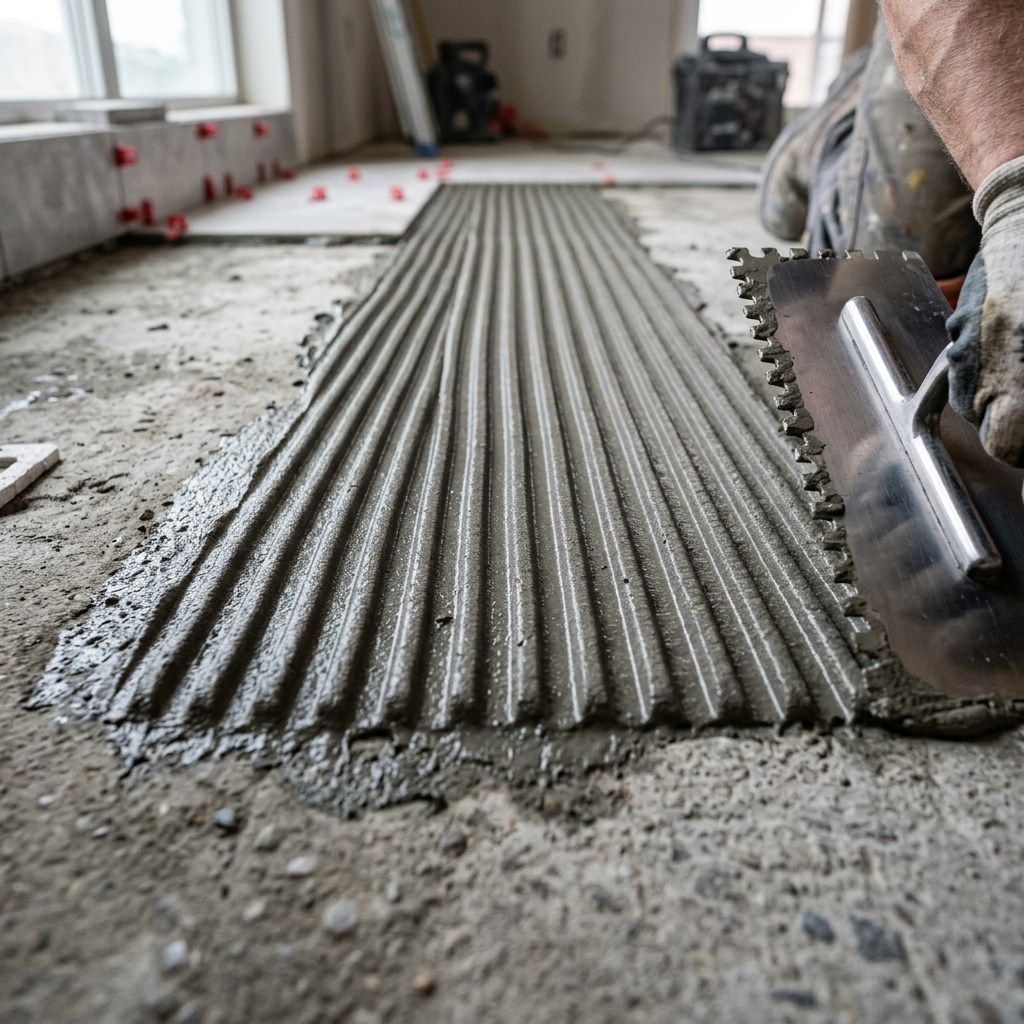
Applying thinset mortar is not like spreading peanut butter. You have to use a notched trowel that leaves specific ridges of mortar on the floor. When you press the tile down, those ridges collapse to create a solid, air-free bed of suction. If you use a trowel with notches that are too small, the mortar will not grip the tile. If you use one that is too large, mortar squishes up through the grout lines and ruins the finish.
Large-format tiles require massive amounts of thinset. A beginner might assume one $20 bag of mortar will cover the entire bathroom. In reality, with a half-inch trowel, that bag might only cover 35 square feet. You find yourself running back to the hardware store covered in wet cement because you ran out halfway across the room. If you are calculating complex patterns like herringbone, you need even more specialized prep, which we covered extensively in our guide to the hidden math behind herringbone tile.
The High Cost of Specialized Tools
You cannot cut porcelain tile with a standard utility knife or a cheap hand saw. You need a wet saw with a diamond blade. A good entry-level wet saw costs around $300. You could rent one for $60 a day, but tile work is slow. A beginner will easily take four days to tile a bathroom, pushing the rental cost past the purchase price.
You also need diamond hole saws to cut circles for the shower plumbing valves, heavy-duty mixing paddles, and tile leveling clips to prevent lippage. The 'small tools' budget on a DIY tile job frequently exceeds $400. You must factor that into your spreadsheet.
Budgeting for Waste
Professional tile setters rarely break tiles by accident. A beginner will break many. You will measure a cut perfectly, put the tile on the wet saw, push too fast, and snap the corner off. You will drop a tile and chip the enamel. You have to order a significantly higher waste margin if you are doing the job yourself. I recommend bumping the standard 10 percent margin up to 20 percent for a first-time DIYer. It gives you the psychological freedom to make mistakes without worrying about running out of matching material.
Need to calculate measurements for your space?
Use our free, interactive Flooring Calculator to calculate dimensions, box requirements, or guidelines automatically.
Calculate Tile Costs→