The Hidden Math Behind Herringbone Tile: Calculating Waste Margins
Herringbone tile layouts instantly elevate the look of a bathroom or kitchen backsplash. The interlocking zig-zag pattern adds movement and high-end texture to a flat surface. But that visual impact comes with a hidden cost that catches most homeowners off guard. If you calculate your material needs using the standard formulas for a straight-lay tile pattern, you will run out of tile halfway through the job. Ordering a second batch a week later introduces the risk of mixed dye lots, where the new tiles have a slightly different color tone than the originals. You have to buy the right amount on day one.
My Hands-On Experience with Complex Tile Layouts
During a 2025 renovation of a mid-century modern home, the client requested a floor-to-ceiling herringbone backsplash using 2x8 inch Carrara marble subway tiles. Natural stone already requires a higher waste margin because you have to discard pieces with ugly veining or deep fissures. We were also wrapping the tile around a large kitchen window and a custom range hood. I calculated a 25 percent waste margin. The general contractor thought it was excessive. By the end of the installation, we had exactly four usable tiles left over. Every single 45-degree angle cut at the room's borders generated scrap that we could not use anywhere else. That project proved why you cannot skimp on material estimates for diagonal patterns.

Why Herringbone Breaks the Standard Math
In a traditional straight-lay or brick-lay pattern, the tiles run parallel to your walls. When an installer reaches the edge of the room, they cut the tile straight across. The remaining cutoff piece can usually be flipped and used to start the very next row. You waste very little material. The industry standard waste margin for a straight layout is 10 percent.
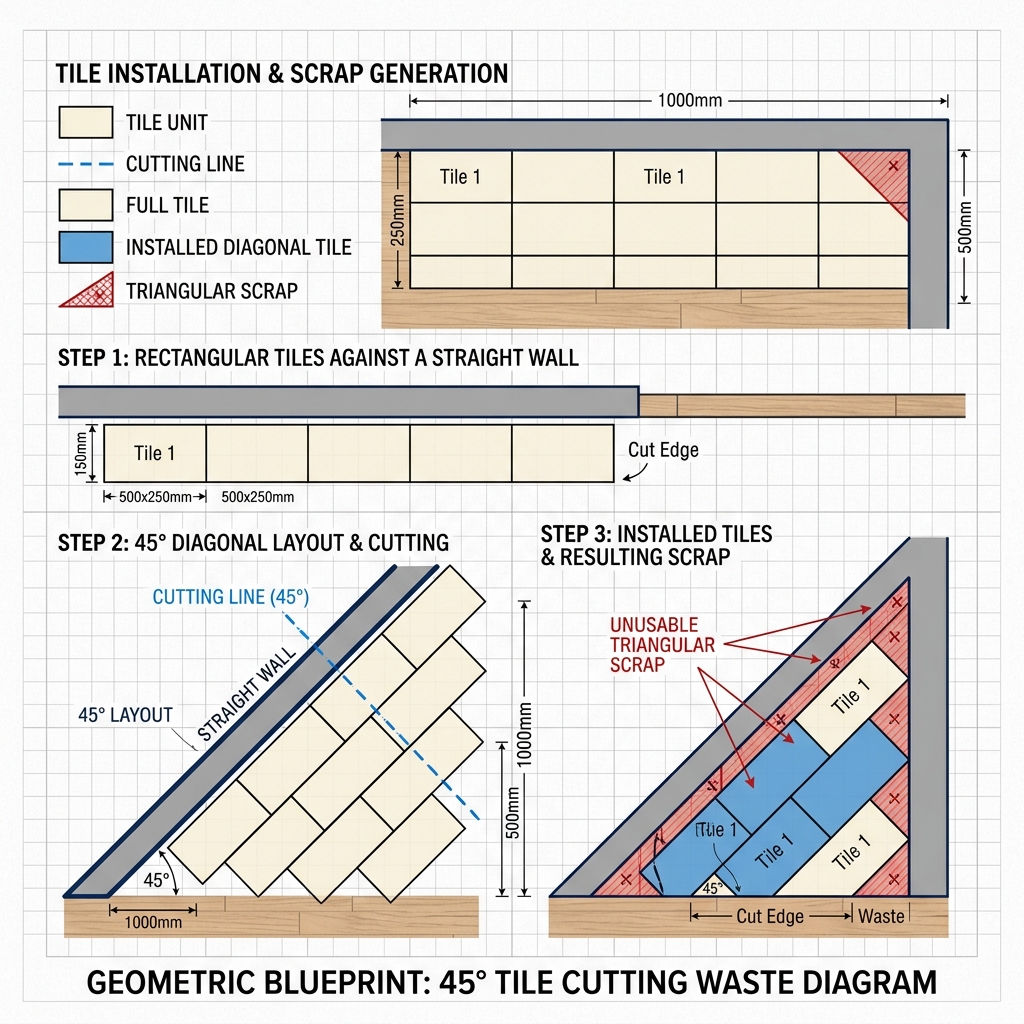
Herringbone requires turning the tiles at a 45-degree angle to the walls. When you hit the ceiling, the floor, or the side walls, you have to cut off the triangular corners of the tiles to create a flat edge. Those resulting triangular scraps are practically useless. You cannot fit them into the opposite side of the room because the angles run the wrong way. Every boundary in the room acts like a shredder for your square footage.
Calculating the Base Square Footage
You still start with the same foundational math. Measure the length of the wall in inches, and measure the height of the wall in inches. Multiply the length by the height to find the total square inches. Divide that number by 144 to convert it into square feet. If your kitchen wall is 120 inches long and 18 inches high under the cabinets, you have 2,160 square inches. Divide by 144, and your base area is exactly 15 square feet.
If you have a window on that wall, calculate the square footage of the window using the same method and subtract it from your total. Do not guess. Get the exact field area.
Applying the Herringbone Premium
Once you have your base square footage, you have to apply the herringbone waste multiplier. Never use the 10 percent rule for this. The Tile Council of North America (TCNA) guidelines suggest planning for significant waste on diagonal installations. You need to multiply your base square footage by at least 1.20 to add a 20 percent waste margin.
You must increase that margin to 25 percent (multiplying by 1.25) if you have any of the following conditions in the room. First, if you have multiple obstacles to cut around, like electrical outlets, pot filler faucets, or floating shelves. Second, if you are installing natural stone like marble, travertine, or slate, because you will find broken pieces in the box. Third, if the room itself is small. A small room has a higher perimeter-to-field ratio, meaning a larger percentage of your tiles will hit the walls and require those wasteful 45-degree cuts.
Accounting for Grout Lines
When you buy tile, the manufacturer usually specifies the coverage per box assuming a standard grout joint. If the box says it covers 10 square feet, that calculation likely assumes a 1/8-inch or 3/16-inch grout line. Many homeowners want a modern, seamless look and ask their installer to use tiny 1/16-inch grout spacers.
If you shrink the grout lines, you are replacing empty space with solid tile. Over a large room, reducing the grout joint from 3/16 to 1/16 of an inch means you need more actual tiles to cover the same physical area. If you plan to use minimal grout lines, factor an extra 2 percent into your total order.
Thinset Mortar and Underlayment
You cannot install tile directly onto drywall in a wet area, and you should not install it directly onto plywood subfloors (similar to how you must prep subfloors before calculating hardwood flooring needs). You need a stable substrate. For floors, measure your square footage and order enough uncoupling membrane, like Schluter Ditra, to cover the room. For shower walls, you need cement board or waterproof foam backer board.
You also have to calculate your thinset mortar. Thinset is sold in 50-pound bags. The coverage depends on the size of the trowel you use. A heavy stone tile requires a half-inch square-notch trowel, which puts down a thick bed of mortar. A 50-pound bag might only cover 40 square feet with a trowel that size. A smaller ceramic tile requires a quarter-inch notch trowel, and that same bag will cover 70 square feet. Check the back of the mortar bag for the coverage chart and divide your base square footage by that number to determine how many bags to haul home.
The Reality of Custom Patterns
Do not let a contractor talk you into ordering exactly what the base measurement dictates. The math proves that diagonal layouts consume material at a much faster rate than straight layouts. Calculate your exact square footage, apply a 20 to 25 percent waste margin, figure out how many boxes that requires, and place the order. Having an extra box left over at the end of the job is an insurance policy, not a math error.
Need to calculate measurements for your space?
Use our free, interactive Flooring Calculator to calculate dimensions, box requirements, or guidelines automatically.
Calculate Your Tile Needs→