Modern holiday decor often feels sterile, lacking the playful character of mid-century celebrations. During the 1950s, living rooms glowed with saturated pastel tones, aluminum branches, and bold metallic foil. You do not need to spend hundreds of dollars at antique malls to capture that era. With simple craft supplies, you can assemble these 15 vintage Christmas decor ideas DIY style that look straight out of the 1950s right on your kitchen table.
1. Shiny Brite ornament wreath
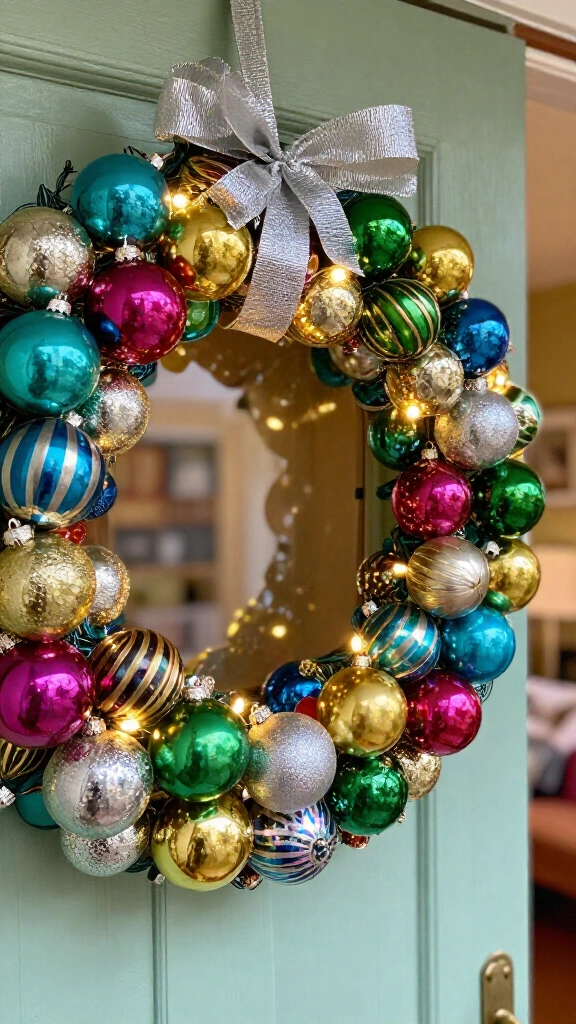
Heaps of colorful glass baubles instantly define atomic-era holidays. Collectors pay steep prices for authentic Shiny Brite ornaments, but you can recreate the appearance with plain glass bulbs and metallic craft paint. Untwist a standard wire coat hanger, shape it into an even circle, and thread the ornament caps directly onto the wire until you pack the loop full.
Anchor each neck to the wire with a drop of hot glue so the baubles stay put when someone opens the door. Combine rich turquoise, magenta, gold, and chartreuse bulbs to reproduce that classic post-war palette. Hang the finished piece on your front door, or coordinate it with front porch Christmas decor ideas DIY lovers can pull off in a weekend to welcome holiday visitors.
2. Bottle brush trees with pastel bleach baths
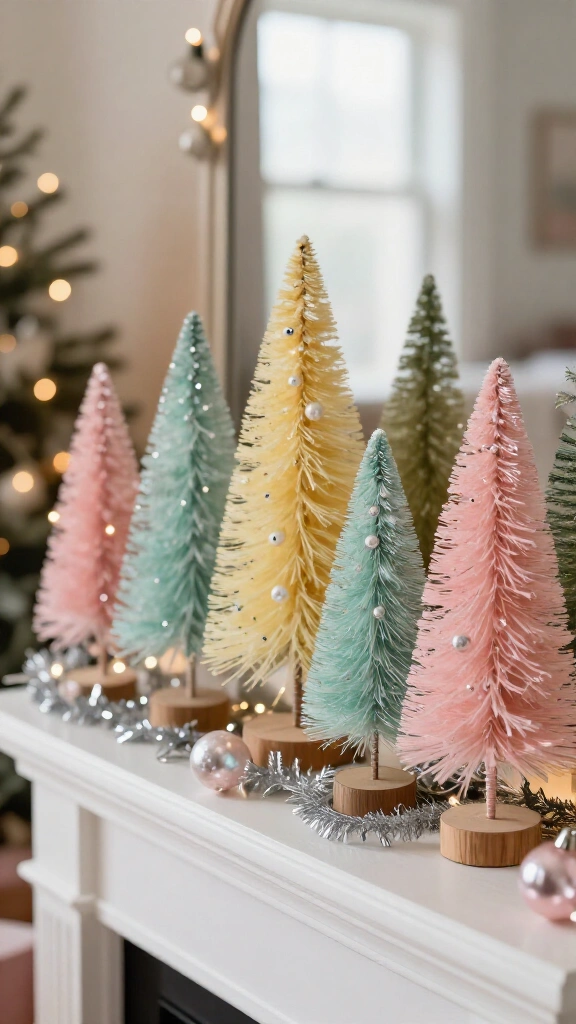
Standard dark green sisal trees look charming, but pastel bleached versions drop your mantel straight into 1955. Submerge budget-friendly green bottle brush trees in a bucket of household bleach and warm water for fifteen minutes. The chemical bath strips the dark green dye within minutes.
Rinse the trees thoroughly in cool water, let the bristles dry, and dip them into bowls of fabric dye. Choose soft mint green, pale pink, peach, or buttercup yellow. Affix small faux craft pearls to the tips with clear craft glue to simulate sugarplum accents. Cluster them under a clear glass cloche on your coffee table.
3. Upcycled aluminum foil fringe garland

Mid-century families proudly displayed shimmering aluminum trees in their front picture windows. You can recreate that atomic sheen without tracking down an expensive vintage tree. Cut sheets of heavy-duty kitchen aluminum foil or silver mylar into strips two inches wide, then snip narrow fringe slits along both sides while leaving an uncut strip down the center.
Twist that central strip firmly between your fingers to fan the foil fringes outward into a thick, reflective rope. Swag this silver garland along your staircase handrail or across your fireplace mantel. The metallic facets catch and bounce every beam of ambient light, giving your room a warm holiday glow.
4. Spun cotton mushroom ornaments
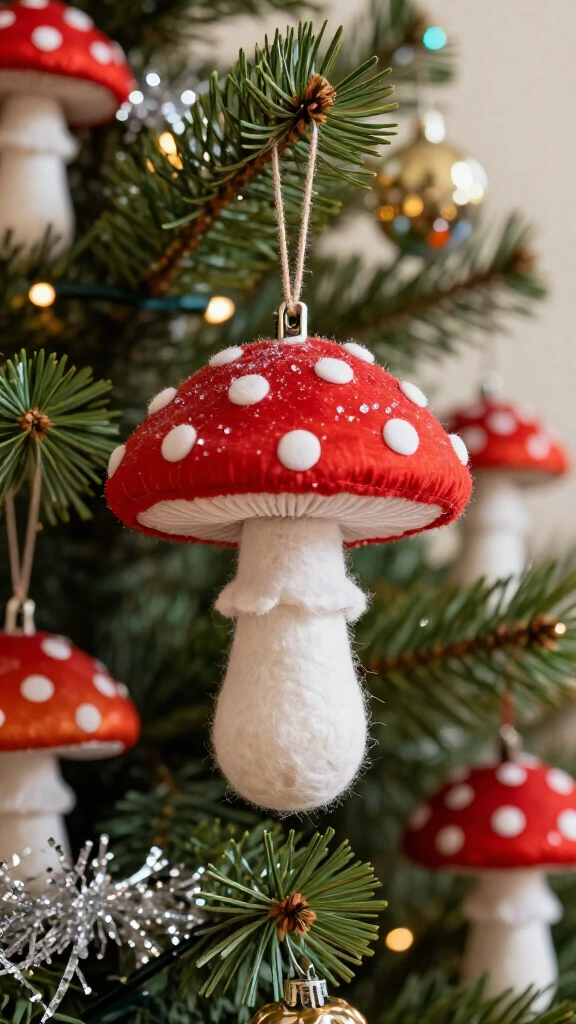
Traditional spun cotton ornaments filled department store shelves across the 1950s. Wind craft cotton batting around a cut piece of floral wire, shaping the top bunch into a round toadstool cap. Paint the cotton exterior with diluted craft glue to harden the fibers into a smooth, durable shell.
Brush the mushroom caps with bright red acrylic paint, dot them with clean white spots, and sprinkle fine mica flakes over the wet surface. These lightweight ornaments clip safely onto fragile outer branches without dragging down the pine needles. Read about original manufacturing techniques in Wikipedia’s spun cotton ornament guide for accurate period details.
5. Hand-stitched felt elf figures
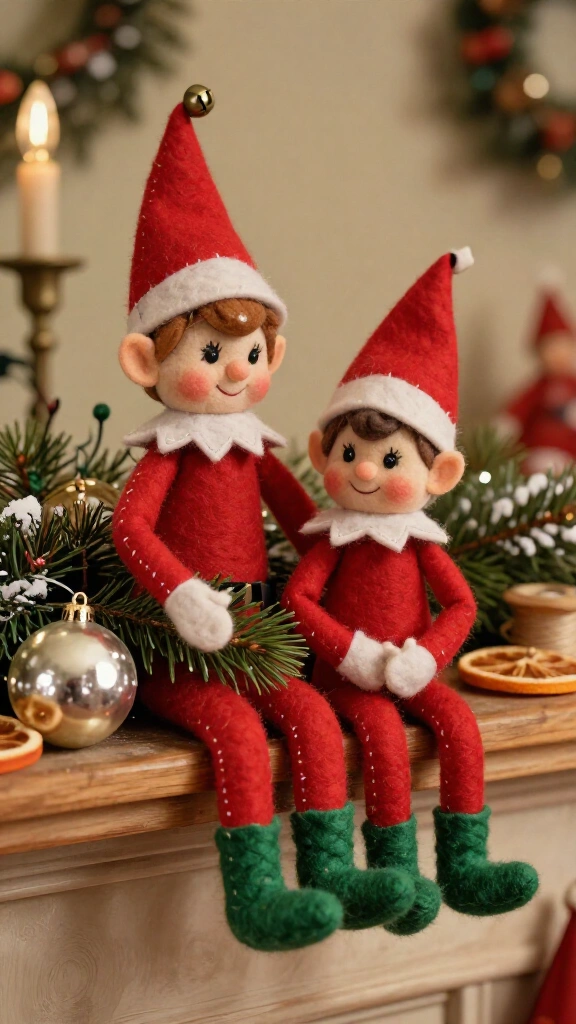
Playful felt pixies routinely peeked out from mid-century holiday displays. Cut miniature boots, tunics, and pointed hats from stiff wool felt in crimson and forest green. Sew the edges together with white embroidery floss using an open blanket stitch.
Pack the elf bodies with polyester stuffing, slip chenille pipe cleaners into the arms and legs for easy posing, and attach a small spun cotton ball for the head. Draw small smiling eyes and pink cheeks using fine acrylic markers. Drape their bendable limbs over your banister garland or place them directly inside a centerpiece bowl.
6. DIY Putz village glitter houses

Small cardboard villages (commonly called Putz houses) formed miniature winter scenes beneath 1950s trees. Cut tiny house templates out of empty cereal boxes, score along the fold lines, and glue the structure together with fast-setting craft adhesive. Paint the cardboard walls with pastel chalk paint, leaving hollow square windows backed with clear yellow cellophane.
Spread white school glue across the roof planes and coat them generously with coarse mica flakes to mimic fresh snowdrifts. Punch a small hole through the back wall of each structure to insert an individual fairy light bulb. Set several houses across a credenza alongside your DIY Thanksgiving decorations transition pieces.
7. Atomic starburst tree topper

Swap a conventional tree topper for a dramatic space-age starburst inspired by Sputnik. Insert sharp wooden skewers into a solid foam sphere, mixing long and short skewers to build an angular burst pattern. Coat the entire assembly with metallic gold spray paint.
Affix clear acrylic rhinestones to the outer point of each skewer with clear glue to catch the Christmas lights. Secure the base of the starburst to your tree top using a hidden gold twist tie. The sharp geometry gives your holiday tree an unmistakable mid-century silhouette.
8. Diorama sugar-egg style ornaments
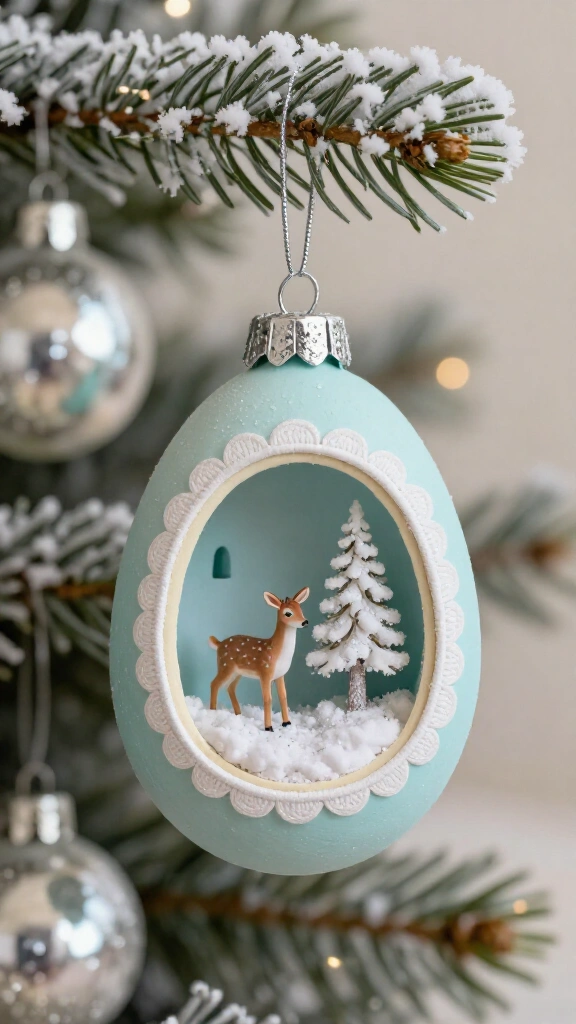
Panoramic peek-through ornaments fascinated children throughout the post-war decades. Make sturdy keepsakes by cutting a clean oval window into the side of a hollow paper-mache craft egg. Paint the outside pastel aqua and line the interior curved wall with pale blue paper.
Glue miniature plastic deer, a bleached sisal twig, and a pinch of artificial snow inside the miniature cavity. Run white scalloped ric-rac trim around the cut edge to cover the raw seam. Looking inside feels like peering into a preserved 1950s winter postcard.
9. Paper honeycomb hanging bells

Collapsible honeycomb paper decorations appeared at almost every mid-century party. Buy accordion tissue honeycomb pads, or craft your own stacks by layering lightweight tissue sheets with alternating lines of glue. Cut the stacked paper into a half-bell silhouette and glue sturdy cardstock shapes to the two outer faces.
Fan the cardstock handles around in a full circle to open the cellular paper ribs, fastening the ends with metal paper clips so you can fold the bells flat when January arrives. Suspend red and sky-blue bells from your dining room light fixture with clear fishing line so they twist softly in the room air currents.
10. Retro clothespin soldier guard
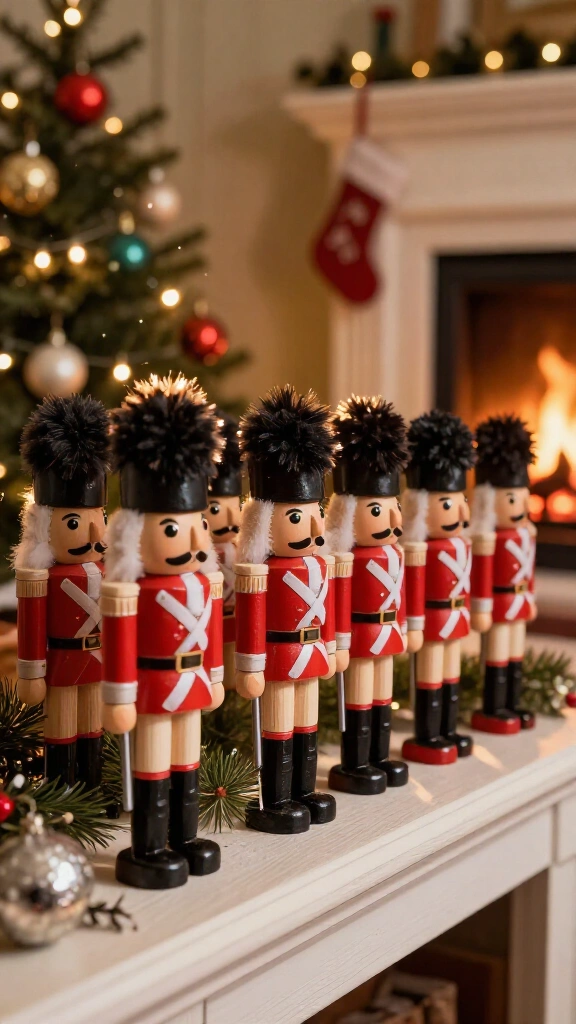
Round wooden clothespins turn into classic toy soldiers on a minimal budget. Paint the top round knob with peach craft paint, adding neat black hair and a small mustache with a fine brush. Paint the middle peg bright red to mimic a formal military tunic.
Wrap thin white vinyl tape diagonally across the torso for cross belts, then coat the lower pegs with black paint for tall boots. Glue a miniature black pom-pom atop the head for a tall guardsman hat. Stand ten or twelve soldiers across your mantelpiece to create a neat, symmetrical lineup.
11. Mercury glass candleholders with mirror spray

Old mercury glass has a mottled, reflective silver surface that antique shoppers prize. You can simulate the finish on inexpensive clear glass holders or recycled glass jam jars. Spray the inside glass surface with equal parts water and white vinegar, then immediately coat the damp surface with mirror-effect spray paint.
Blot the wet paint lightly with a crushed paper towel to remove random flecks and expose the glass underneath. Drop tea lights into the finished jars to cast textured shadows across the table. The candlelight shining through the distressed silver mimics authentic mid-century mercury glass.
12. Mid-Century geometric paper stars

Bold geometric shapes appeared on 1950s fabrics, wallpapers, and holiday trimmings. Fold traditional German Froebel stars from strips of heavy pastel craft paper to introduce that geometry to your branches. Cut uniform strips, weave the four center quadrants, and fold the paper outward into sharp three-dimensional points.
Dip the outer tips into warm melted wax and dust them with iridescent glitter before the wax hardens. Thread several folded stars onto cotton baker twine for a simple garland, or loop velvet ribbon through individual points to hang them directly from tree boughs. The sharp paper facets create crisp geometric shadows against your tree lights.
13. Vintage postcard ribbon garland
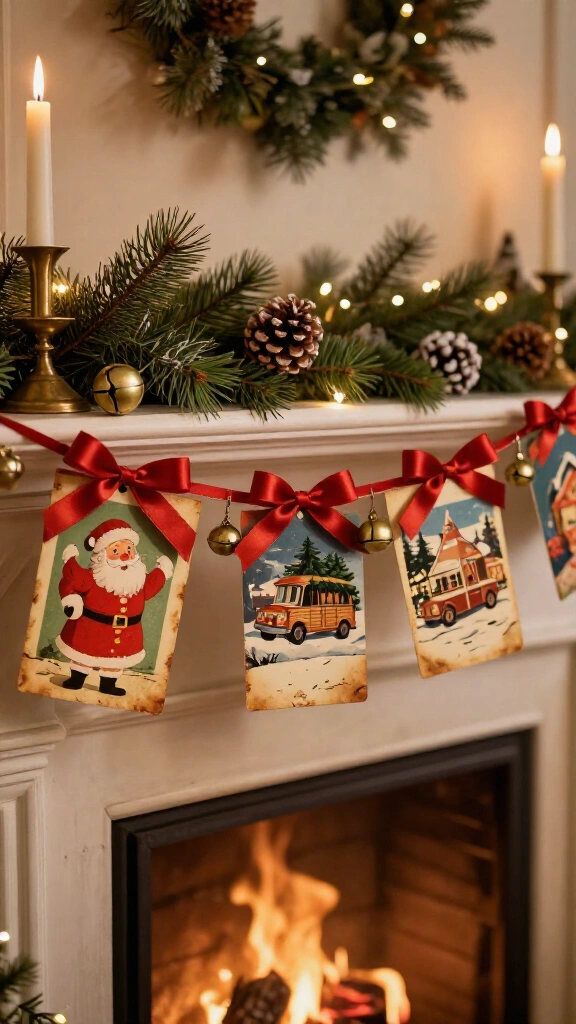
Mid-century holiday postcards displayed colorful illustrations of round-cheeked Santas, station wagons, and snowy village streets. Download free public domain images from the Library of Congress and print them onto heavy cardstock. Rub a brown ink stamp pad around the outer edges to replicate naturally aged paper.
Punch holes in the top corners of each card and thread them onto a wide red satin ribbon. Alternate the cards with small brass jingle bells and drape the garland across your mantel. The project lets you present 1950s holiday graphic art without damaging fragile antique paper.
14. Faux popcorn and cranberry strands

Real popcorn garlands attract insects and shatter easily, but the look remains an essential part of 1950s holiday decor. Craft a permanent version using lightweight air-dry clay or shaped packing foam chunks. Pinch small bits of clay into irregular kernel shapes with your fingertips and let them dry overnight on a tray.
Thread the imitation popcorn kernels onto heavy nylon floss using an embroidery needle, alternating them with deep red wooden beads for cranberries. Spray the complete strand with clear satin acrylic sealer to keep dust from clinging to the clay. You can wrap this clean replica around your tree branches every year without vacuuming popped corn crumbs from your rug.
15. Kitsch ceramic-look plastic reindeer

Vintage ceramic deer figurines produced by companies like Holt-Howard and Relco had huge painted eyes and sugary expressions. You can copy that look using cheap plastic toy deer from the dollar store. Spray each plastic deer with two coats of warm beige satin paint to hide rough factory seams and dull the synthetic gloss.
Draw wide doe eyes, black lashes, and bright red noses with fine paint pens. Tie small metallic ribbons around their necks, then cover each figurine with two coats of high-gloss clear varnish to simulate glazed ceramic pottery. Place the finished deer next to your fall decor DIY projects transitions to welcome holiday guests.
Making your own mid-century holiday decorations captures post-war warmth without depleting your wallet on fragile antiques. These DIY projects let you bring classic colors and retro style into your home with basic craft supplies. Turn on the tree lights, spin an old record, and enjoy your handmade retro winter setup.