For decades, choosing a light bulb meant looking at wattage: a 60-watt bulb for a bedside lamp, or a 100-watt bulb for a dark kitchen. With modern LED technology, wattage measures only electrical power consumption, not visible light output. An 8-watt LED produces the exact same brightness as an old 60-watt incandescent bulb. To design a comfortable, properly illuminated room without harsh glare or dark shadow pockets, you must calculate lighting needs in **lumens** and **foot-candles**.
A Real Lighting Case Study: The Dim Kitchen Island
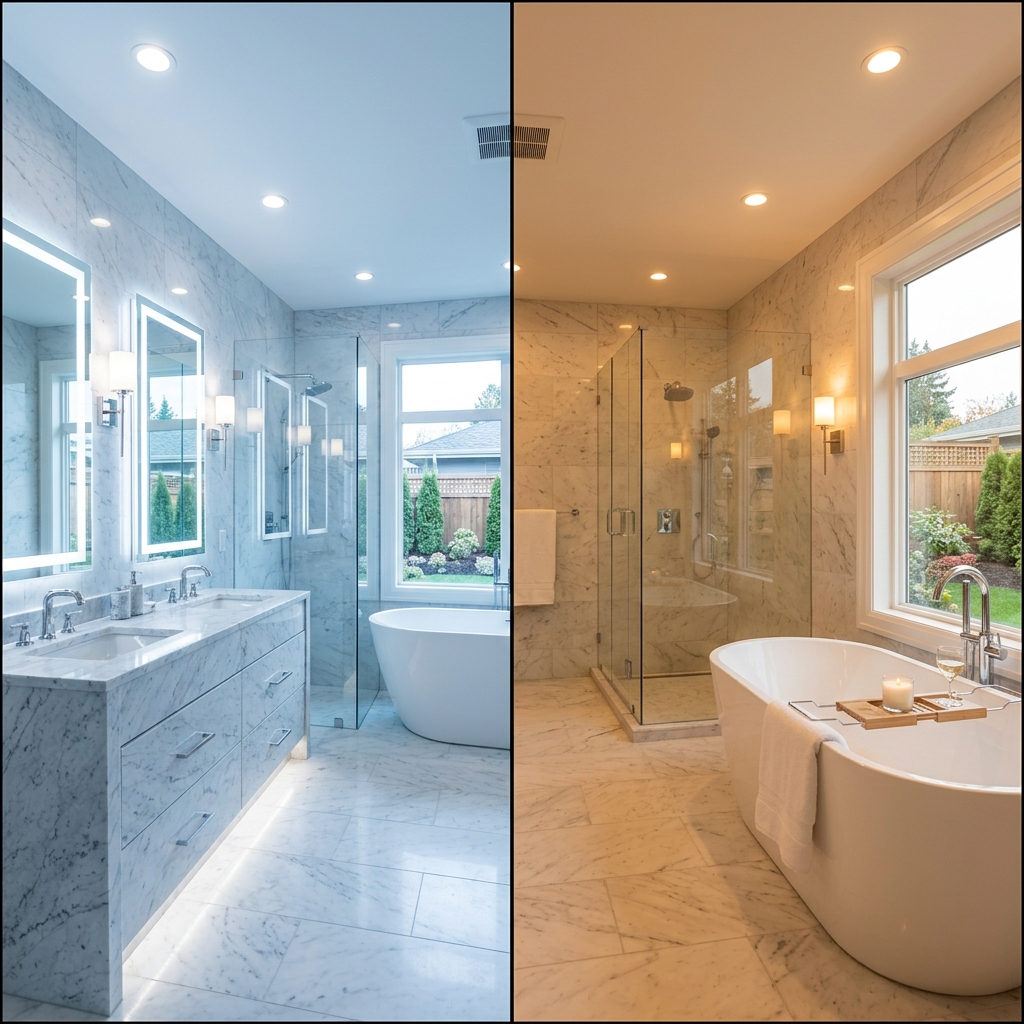
In early 2026, a client in Austin installed two decorative glass pendant lights over a 9-foot kitchen island. They selected stylish 4-watt vintage Edison LED bulbs emitting 300 lumens each (600 lumens total). When preparing food on the quartz island, the counter felt dark and shadowy. Task prep surfaces require 50 foot-candles (roughly 2,500 total lumens across a 50-sq-ft island). Replacing the dim Edison bulbs with 12-watt LED bulbs emitting 1,250 lumens each instantly illuminated the workspace.
Understanding Lumens and Foot-Candles
Lumens (lm): The total amount of visible light emitted by a bulb or fixture. Higher lumens equal brighter light.
Foot-Candles (fc): The intensity of light hitting a specific surface area (one foot-candle equals one lumen per square foot).
Lighting Targets by Room Category:
- Living Rooms & Bedrooms (Ambient): Requires 10 to 20 foot-candles (10-20 lumens per sq ft).
- Dining Rooms & Hallways: Requires 20 to 30 foot-candles (20-30 lumens per sq ft).
- Kitchens & Home Offices (General): Requires 30 to 40 foot-candles (30-40 lumens per sq ft).
- Kitchen Task Surfaces & Bathroom Vanities: Requires 50 to 75 foot-candles (50-75 lumens per sq ft).
Understanding Color Temperature (Kelvin) and CRI
Brightness is only half the lighting equation. You must also select correct Kelvin temperature and Color Rendering Index (CRI):
2700K (Warm Soft White): Cozy, golden light ideal for bedrooms and living rooms.
3000K (Warm Bright White): Clean, neutral light ideal for kitchens, bathrooms, and modern residential spaces.
4000K (Cool White): Crisp daylight tint best suited for commercial offices and garages. Avoid 4000K+ in cozy residential living areas.
CRI (Color Rendering Index): Choose bulbs rated **90+ CRI** to ensure paint colors, wood stains, and food appear natural and lively.
Step-by-Step Room Lumen Calculation Guide
Follow this procedure to calculate total lumen needs for any room:
- Step 1: Calculate room surface area (Length × Width in feet = Square Feet).
- Step 2: Determine target foot-candles based on room function (e.g., 30 fc for a kitchen).
- Step 3: Multiply Square Feet by Target Foot-Candles to find Total Required Lumens.
- Step 4: Divide Total Lumens by lumen output per fixture to find required bulb/can count.
- Step 5: Layer lighting across three circuits: Ambient recessed cans, Task pendants/under-cabinet strips, and Accent wall sconces.
Common Room Lighting Errors
Avoid these four common lighting mistakes:
- Installing 5000K daylight bulbs in living rooms: High Kelvin bulbs (5000K+) cast a harsh sterile blue light that feels like a hospital hallway.
- Relying on a single ceiling light fixture: Depending on one central flush-mount light casts harsh shadows when working at counters.
- Placing recessed cans directly behind work chairs: Overhead lights placed behind seating cast your body shadow straight onto desk surfaces.
- Skipping dimmers: All residential lighting circuits should be connected to LED-compatible dimmers to adjust mood from day to night.
Frequently Asked Questions About Room Lighting
How many recessed cans do I need for a 15×20 living room?
A 300-sq-ft living room requires roughly 4,500 lumens (15 fc × 300 sq ft). Using 800-lumen 4-inch LED cans, you need 6 recessed fixtures spaced 5 to 6 feet apart.
What is the difference between 4-inch and 6-inch recessed cans?
4-inch LED cans offer a sleek, modern aesthetic popular in modern homes. 6-inch cans distribute light across wider angles and are common in high-ceiling spaces.
Why do my LED bulbs flicker when dimmed?
Flickering happens when dimmable LED bulbs are paired with older incandescent dimmer switches. Replace older switches with an LED-rated ELV (Electronic Low Voltage) or CL dimmer.
Professional Trade Best Practices and Environmental Considerations
Building codes and environmental conditions dictate how long interior materials remain functional. Environmental factors like relative humidity shifts, thermal expansion coefficient, subfloor moisture vapor emission rates, and structural deflection play massive roles in project longevity. Professional contractors always test ambient indoor air conditions using digital moisture meters and thermo-hygrometers prior to unloading finish materials on site.
Acclimation is a mandatory requirement for all wood, laminate, and luxury vinyl flooring products. Store boxed materials inside the climate-controlled installation space for a minimum of 48 to 72 hours prior to opening packages. This allows internal moisture content to balance with home HVAC operating levels, preventing post-installation board buckling or joint gaps.
Detailed Tool Checklist and Equipment Safety
Working efficiently requires gathering appropriate safety gear and specialized trade tools before starting construction. Always wear ANSI-approved eye protection, N95 dust respirators when cutting masonry or drywall, and heavy-duty knee pads during floor installations. Keep a calibrated 4-foot spirit level, laser measuring tool, steel square, and chalk line on hand for layout accuracy.
- Personal Protective Equipment: N95 respirators, hearing protection, safety glasses, cut-resistant gloves.
- Layout Tools: 4-foot spirit level, laser distance meter, framing square, blue chalk reel.
- Cutting Tools: Miter saw with carbide finish blade, oscillating multi-tool, utility knife with fresh blades.
- Surface Prep Tools: Floor scraper, margin trowel, heavy-duty mixing paddle, shop vacuum with HEPA filter.
What building codes govern residential interior renovations?
Residential renovations are governed by the International Residential Code (IRC) alongside local municipal amendments. Key code enforcement areas include structural joist span limits, stairway riser heights, egress window dimensions, and electrical GFCI/AFCI breaker requirements.
How can I check if a contractor is properly licensed and insured?
Always request a copy of the contractor’s state license number and Certificate of Insurance (COI) listing general liability and workers’ compensation coverage. Verify license standing directly on your state department of professional regulation portal.
Professional Installation Standards and Material Science
Understanding the material science behind interior building components prevents premature failure. Every building material, from ceramic tile thinset and gypsum drywall to natural hardwood flooring and composite decking, has a specific thermal expansion coefficient and equilibrium moisture content. When indoor humidity fluctuates between seasonal extremes (dry winter heating versus humid summer air), un-acclimated materials undergo dimensional change.
For interior wood products, relative humidity must be maintained between 35 percent and 55 percent at a temperature range of 60 to 80 degrees Fahrenheit. Leaving wood flooring or cabinet components in an unheated garage or damp basement prior to installation causes warping, board cupping, and joint separation after installation.
Comprehensive Field Tool Checklist and Job Site Setup
Executing clean installation work requires assembling high-quality trade tools before beginning demolition or layout. Standard DIY toolkits often lack the precision required for tight tolerances. Invest in a 48-inch spirit level, a digital angle gauge, laser distance measure, carbide-tipped cutting blades, and heavy-duty surface protection film.
- Surface Preparation: Heavy-duty floor scrapers, self-leveling compound mixing barrels, margin trowels, and industrial shop vacuums.
- Precision Measurement: Digital calipers, laser levels, stud finders with deep scan modes, and steel framing squares.
- Cutting Equipment: Dual-bevel sliding miter saws, continuous-rim diamond wet saws, and oscillating multi-tools.
- Safety Equipment: N95 particulate respirators, ANSI-approved eye protection, and heavy-duty knee protection pads.
Building Code Compliance and Inspection Readiness
All major residential remodeling projects must comply with the International Residential Code (IRC) and local municipal amendments. Inspections typically occur at three key project stages: rough framing/structural, rough plumbing/electrical/mechanical, and final occupancy sign-off. Skipping permits or failing to schedule inspections can lead to stop-work orders, fines, or issues when selling your property.
How do I know if my project requires a building permit?
Cosmetic updates like painting, hanging curtains, or installing floating floors generally do not require permits. Structural wall removal, electrical circuit additions, plumbing line relocations, and exterior deck builds require municipal permits and inspections.
What is the best way to clean and maintain finished surfaces?
Use pH-neutral cleaners specifically formulated for your material type. Avoid harsh bleach, ammonia, or abrasive scrubbing pads on finished hardwood, natural stone tile, or acrylic bath surfaces.
Need to calculate measurements for your space?
Use our free interactive tool to calculate dimensions automatically.
Calculate Your Room Needs →