The Mathematics of a Gallery Wall: How to Hang Art Without Ruining Your Drywall
A floor-to-ceiling gallery wall is a massive design statement. It transforms a blank, boring hallway into a curated exhibition of personal history. Unfortunately, most people try to hang a gallery wall dynamically. They hold a picture up, eyeball the center, drive a nail into the drywall, and repeat. By the time they hang the fourth picture, the entire arrangement is crooked, the spacing is wildly inconsistent, and they have driven twelve unnecessary holes into the wall trying to correct their mistakes. A gallery wall requires rigorous geometric planning on the floor before you ever touch a hammer.
My Hands-On Experience with Swiss Cheese Walls
In the summer of 2024, I was called to an apartment where a renter had attempted to hang 15 framed photographs above a large sofa. They had no plan and no level. The arrangement heavily favored the left side, tilting the visual weight of the entire room. Worse, they had used massive drywall anchors for tiny 8x10 frames. When they tried to move the frames to fix the layout, they tore massive chunks of paper facing off the drywall. I had to spend an entire day patching the wall with joint compound, sanding it flat, and repainting it (a process similar to fixing the architectural curves in my drywall archway guide). We then spent four hours planning the layout properly on the floor before hanging a single piece.
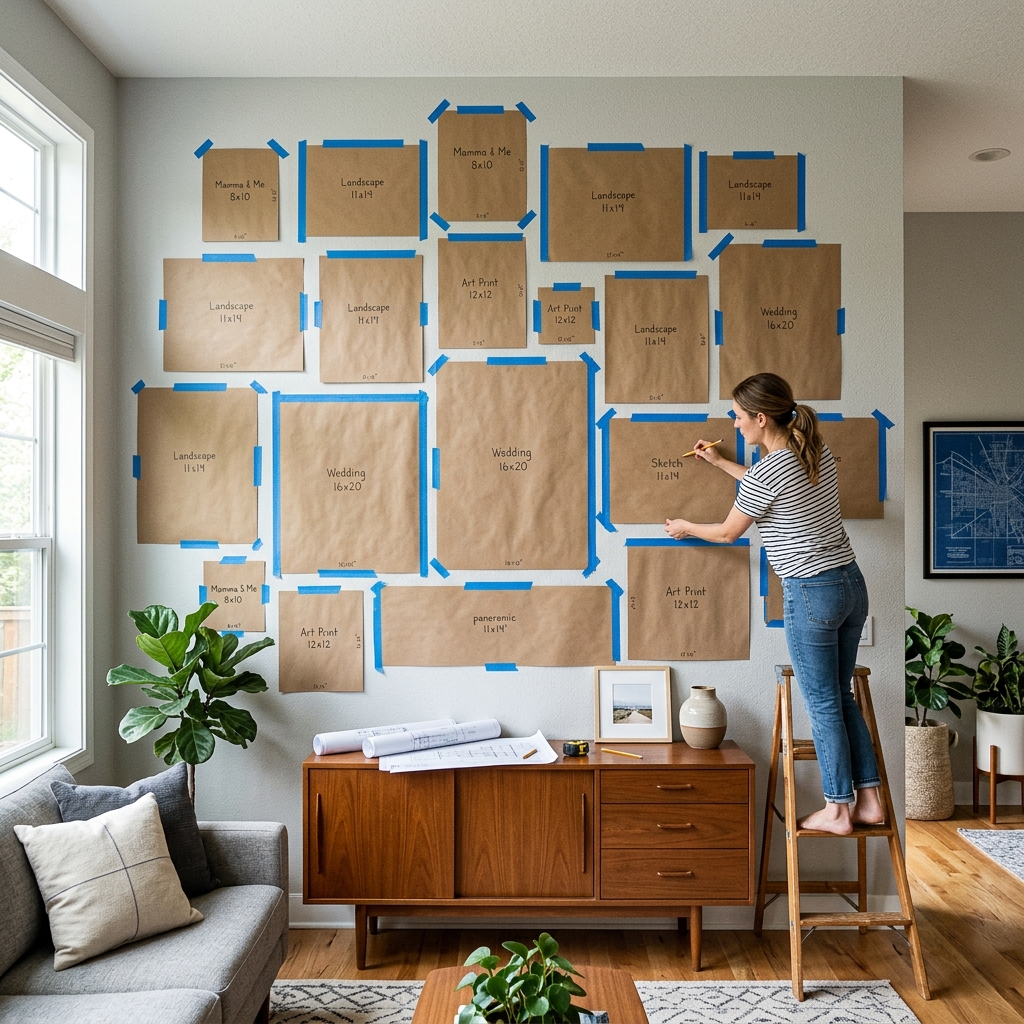
The Kraft Paper Method
Do not plan your layout on the wall. Plan it on the floor. Clear a massive space in your living room. Lay out all your framed art. Begin arranging the pieces into a cohesive geometric shape. The secret to a professional gallery wall is maintaining exactly two inches of blank space between every single frame, regardless of the frame's size.
Once you have the perfect layout on the floor, buy a roll of brown kraft paper. Trace every single frame onto the paper and cut the rectangles out. Place the paper cutouts on the back of the frames, pull the hanging wire tight, and mark exactly where the nail must go on the paper.
Take those paper cutouts and tape them to the wall using blue painter's tape. Use a tape measure to guarantee you have exactly two inches of spacing between the paper templates. Use a long spirit level to ensure the grid is perfectly horizontal.
Finding the Center Point
A gallery wall must be anchored to the room. If you are hanging it above a sofa, the American Society of Interior Designers (ASID) recommends treating the entire collection of frames as one single, massive piece of art. The absolute center of that massive collection must hang exactly 57 to 60 inches above the floor, which aligns with standard human eye level. (This is the exact same ergonomic principle we use when calculating perfect TV mounting heights).
Once the paper templates are taped to the wall and leveled, do not take them down. Drive your nail directly through the mark on the kraft paper, straight into the drywall. Once the nail is secure, simply tear the paper off the wall and hang your frame. You will have a geometrically perfect gallery wall with zero wasted holes.
Need to calculate measurements for your space?
Use our free, interactive Paint Calculator to calculate dimensions, box requirements, or guidelines automatically.
Plan Your Wall Space→